Saturday, December 31, 2011

The Word!

Hello friends,

Last year, I noticed that many blogging friends chose a word that spoke to them and was pertinent for their journey for the coming year. I thought I might join the party and try and find 'my' word  for 2012.
I have been mulling over this for weeks.....choosing and re-choosing yet again. Thinking each time I had it, but feeling not entirely positive about my choice.

But this morning while browsing the internet ( not for words, just general stuff!) a word jumped from the page and in to my brain and heart and I just knew it was for me.

You might think "what is all the big deal over a word all about?!", but for those of you who join in this bit of fun, I am sure you understand how important it is to have just THE word that you know to be right.

The word that chose me really, is "DEVELOP"

-to bring out the capabilities or possibilities of
-to cause to grow or expand
-to bring into being; generate; evolve. This meaning of the word was sourced from DEVELOP - Tiffany Dahle Photography

Why this word? Well, this is what this word spoke to me about....I will...
- continue to develop my bead and jewelry making skills,
-to develop a style that speaks to me...maybe even begin to sell beads/components, etc
-to further develop my blog, including computer and photography areas,
-and of course to develop and evolve in all areas of my personal life.


So, tell me..."Have you chosen your word yet?"

To see other WORD choices, I have linked up to My Heart Art....pop by and check them all out.


Cheers for now on this last day of 2011,

Jenni

Thursday, December 29, 2011

Sydney- A Trip to the Pittwater

Hello dear readers and friends,

Not long ago I read two books that I enjoyed immensely. They were "Salvation Creek" and "The House", both by Susan Duncan.
Susan was previously the editor of two of Australia's top women's magazines.
However, after experiencing the death of beloved family members, she changed her life course and went to live in the Pittwater region of Sydney. Susan wrote both of these books while living there.

The Pittwater region north of Sydney is truly unique. Pittwater is an inlet of the Pacific Ocean on the Northern outskirts of Sydney. Australian bushland, mainly National Park, comes down to the waterline. The land is steep and densely forested with occasional pockets of housing, not always accessible by road. The houses are sometimes almost lapped by the water and some are built perched in a somewhat precarious manner against the hillside. In some instances, access to the house can be so steep as to warrant a little elevator or an airial cable to help take up shopping etc up the incline.

There is an island (Scotland Island) surrounded by many little picturesque bays . To get around, you can hop on a ferry which goes around the island every hour or use your own boat. For those living in this region, access by boat is often the only choice. All furniture and shopping has to be transported by water. (I have since heard there is a communal car on the island ....  I was told there is a roster for people to drive the car and it is used to go to the ferry etc ... if you have car access to your house.)

Each of Susan's books describe the amazing community of people she met in the region, and how she was drawn back to the enjoyment of life by their warmth, humour and love.

While at Pittwater, we decided to take the ferry around the island. The ferry 'conductor' pointed out houses of interest ... some had once belonged to some Australian actors (iconic Australian actor, Chips Rafferty, Noni Hazelhurst  and also an Australian infamous Madam, Tilly Devine, who was recently featured in the Australian television series, "Underbelly-The Razor Gang).

One house that I really wanted to see was the pale yellow house on a hill called 'Tarrangaua', which was the former home of the Australian poet, Dorothea Mackellar. It stands high on a hill and is surrounded by tall eucalypt trees ..... and unfortunately, I could not get a decent photo of it. This is "The House" which is the subject of Susan's second book.

Local transport- the "tinny"

Main wharf on the mainland at Church Point

Back of the Church Point restaurant/general store/post office

Scotland Island is in the distance.

Houses close to the water and going up the hill.

The Lovett Bay Boatshed which features quite a lot in Susan Duncan's books.

Lovett Bay Ferry stop.

Hope you are not getting too bored! This is a bit of a long post.
The last bit of information I wish to share with you is this poem by Dorothea Mackellar....
Dorothea wrote a poem " My Country" when she was 19 years old. The second verse of this poem has become probably the best known stanza in Australian history. Here is the poem in it's entirety.


      "My Country"
The love of field and coppice
Of green and shaded lanes,
Of ordered woods and gardens
Is running in your veins.
Strong love of grey-blue distance,
Brown streams and soft, dim skies
I know, but cannot share it,
My love is otherwise.

I love a sunburnt country,
A land of sweeping plains,
Of ragged mountain ranges,
Of droughts and flooding rains.
I love her far horizons,
I love her jewel-sea,
Her beauty and her terror
The wide brown land for me!

The stark white ring-barked forests,
All tragic to the moon,
The sapphire-misted mountains,
The hot gold hush of noon,
Green tangle of the brushes
Where lithe lianas coil,
And orchids deck the tree-tops,
And ferns the warm dark soil.

Core of my heart, my country!
Her pitiless blue sky,
When, sick at heart, around us
We see the cattle die
But then the grey clouds gather,
And we can bless again
The drumming of an army,
The steady soaking rain.

Core of my heart, my country!
Land of the rainbow gold,
For flood and fire and famine
She pays us back threefold.
Over the thirsty paddocks,
Watch, after many days,
The filmy veil of greenness
That thickens as we gaze ...

An opal-hearted country,
A wilful, lavish land
All you who have not loved her,
You will not understand
though Earth holds many splendours,
Wherever I may die,
I know to what brown country
My homing thoughts will fly.

That is the end of my post for today, hope you are enjoying your day whatever you are doing.
Jenni


Wednesday, December 28, 2011

A Creative Fusion.

Hello dear friends,

Prior to Christmas, I joined up to participate in an online course, "Of Towers and Turrets" created by Sharon Tomlinson and Deryn Mentock. I did wonder if I would have the time to do it ... but decided I wanted to do it so much I just HAD to make the time!

The course is described as "An exquisite Fusion of Mixed Media and Mixed Metals".
There are many elements about this course that are brand new to me and consequently, it will be a challenging and yet an exciting process.
I have never really used paints (I guess I did in my school days ... but that was SO long ago it doesn't count!)

Sharon's expertise and input is in the painting and collage area and Deryn's speciality is as the metal and jewelry teacher. I am hoping that the combination will lead me to a more artistic approach to jewelry-making.

I have only recently started to apply myself to beginning the course.
I bought the requisite paints etc, with me to Sydney while I am on holidays and have had a bit of fun playing around making some stencils and word stamps.
Here are a few of my beginners efforts...still a lot to do!!

Stencilled color paper

stencils

and more!

Hand made word stamps.

I am looking forward to the next step ... more play with the paints!

I hope you are all enjoying your holiday break as much as I am.

Until next time,
Jenni

Sunday, December 25, 2011

Merry Christmas

Hello dear friends and readers,

Just a short note to wish you all a Merry Christmas, wherever you may be around the world.
I know the year is not quite over yet....but I just want to say how much I have enjoyed my first year of blogging and meeting such a lovely lot of people from both near and far ; it has been such fun.

I wish you all a happy holiday time with lots of fun, family and friends.
To my followers, both old and recent...thank you so much for dropping by and commenting on my blog..it has been a thrill and a privilege to get to know you.

I am holidaying myself at the moment in Sydney (Australia)......blog posts may be a little far and few between....however I do want to show you some of this lovely, vibrant city....so will be sharing a few photos...


Cheers for now,

Jenni

Friday, December 16, 2011

The Finished Bed Head

Hello dear readers,

As busy as this time of year can be, I somewhat rashly also chose to do a little home decorating.
In a previous post, I mentioned how I had been painting my daughter's bedroom while she was away overseas.
I decided to also make a padded headboard for her bed ... something I had never done before .. but after some internet research, thought it was within my capabilities!

These are the steps I took, if you are interested:


1. Measure width of bed, add some extra for overlap on each side.  Measure hight of bed & mattress and determine a suitable hight for the bedhead.

2. Purchase wood (we used MDF), upholstery foam, buttons and material, cut it to size or get it cut for you.

3. Mark a grid for placement of buttons (if you want the buttoned down look).

You can see the grid marks and the slight overlap ( a few inches each side) on sides of the bed. 

4. Drill a hole at the junctions of the lines for placement of buttons. Make sure your drilled holes are large enough to fit your (upholstery/long) needle.

5. Using spray adhesive, (best to do this outside or in a well ventilated area) align foam which has been cut to size and attach to the board making sure it aligns perfectly.  We used 2-inch thick foam (which may have been either too thick or too dense as it made the buttoning quite difficult).

6. The foam is then covered with quilting batting (use spray adhesive again.) The batting should be pulled quite firmly and the edges wrapped over and attached to the back of the board with staples.
This step softens the edges of the foam. Make sure there are no creases.

As you can see, I chose to pad the board only as far as the start of the mattress. This then allows for the bed to sit a little further back. ( it's also less work!!)

7. Cover your board with material. I attached my material horizontally across the board, as the width of the material was insufficient to cover it in one piece vertically and I did not want any seams to show. I did join and double sew the seam at the point where the padding and board line meet.

Joined  material pieces. The joined area was then stapled to the board under the lower edge of the foam and the join was not visible to the eye at all.

8. Staple the material all around the board working from the middle on one edge to the outside edge. Pull it firmly but not excessively tightly. Make sure you do not distort any pattern. If you are not going to button the head board you can probably make it a little tighter ( I found this out as I had pulled one side a little tighter and the fabric is a little distorted after buttoning. However, because it is a plain fabric, the distortion is a lot less obvious to the eye than if it had been a patterned design.

Covered upholstery buttons.

9. After looking at pre-made button kits which looked a little flimsy, I decided to get the buttons professionally covered by an upholstery supply company. This was very good value at a $1 a piece .... well worth it!

To attach the buttons was a bit tricky.  This is what I did....

- use upholstery cotton with a very long needle.
- I double, doubled my thread (make your thread quite long)
- poke needle through hole, foam and material, leaving a tail at the rear.
- measure to see if in correct spot. (Not so important with the first button but becomes important later when you want all buttons to align well ... sometimes you can actually angle the needle and the placement can then be a little off.)
- bring the needle all the way through to the material side
- wind your cotton 4 times through the shank hole of the button. (Using needle to go through the hole only)
- Remove needle and tie a knot (I did 4 for security) where the two ends meet at the shank. Cut off excess.
(this was just a way I worked out .... other information I had read said to go back through the foam using the same hole and tie at the rear. I found this impossible to do.)
- With a willing helper (e.g. a caring and sharing husband)  ... one person pushes the button in from the material side while the other staples the cotton, hammers it down securely and then tapes over the staples with duct tape.
- work from centre to outside, smoothing material, if needed, as you go. Try and make sure the buttons are evenly indented.


9. The very last step was to spray the bedhead with some fabric protector. I had previously done a test patch with spare material making sure the fabric was colour fast (wet a spot with the fabric protector and rub with white cloth -- if cloth remains white, fabric is color-fast).  I lightly sprayed two coats allowing time to dry in-between coats.

Finished bedhead, showing the rows of buttoning. 
You can see the mattress fits well at the junction of board and foam. I was going to bolt the board to the base of the bead. But, when I pushed the bed against the headboard, it was extremely stable so I am going to omit this step.

It worked out well and I am so pleased with the result - I hope my daughter likes it.


Well, that's it for today...and now to get my act together and go and do some Christmas organisation!!

Cheers and have a lovely day,

Jenni


Sunday, December 11, 2011

I Heart Macro - flowers from the cake

Hello dear friends,

It has been a while since I posted....this time of the year is a little crazy....so much happening.
Today I am linking up to I Heart Macro...a lovely site for those who love up close and macro photos.
Lori also makes stunning re-purposed leather bags...so take a peak while you are there.

My submission today is a little floral cake topper from my wedding cake....26 years ago!!
I keep it under a little glass dome...but, of course it still has deteriorated...looks a little grungy in the photos!

I am thinking of weddings today..as I am going to the wedding of a niece later this afternoon...hoping the rain stays away for her! It has been torrential overnight. It certainly will not dampen the occasion if it is though!!

A little faded and battered ....but it is 26 years old!

Little glass dome protector... I think it is actually a butter dish?


studio waterstone


Please click on the photo link above to take you to Lori's site and other participant's photos.
Cheers for today... I am off to get ready for this lovely event

Jenni

Sunday, December 4, 2011

I Heart Macro - Up Close Today

Hello dear friends

I have no 'macro' photos today......just a few up close photo vignettes from around my home - I lent my camera to my daughter who has gone to a wedding...totally forgetting I had not taken any photos for today's post...running a little behind this week...it has been a busy one.

These  photos were taken a little while ago using the 'Hipstamatic' app on my iPhone. It's a lot of fun.
I love how they make even the most mundane photo look old and interesting...wish someone could do that for me!!

Hats and shopping bags in the hall.....also left over streamers from last New Year's Eve!

An old tin...it is a Bushell's 'Tea of Flavour tin' and has a koala, emu and kookaburra on the other sides.

Old wooden shoe lasts.

Pink lamp..a family heirloom.

Italian and French pots.

studio waterstone


Linking up to I Heart Macro ...fun for all those who love up close and macro photography. Head on over to Lori's and check it out!

Cheers for now,

Friday, December 2, 2011

Day 7-- Virtual Craft Show....Head on Over.

Hello dear readers,

I am sure most of you know by now of the Virtual Craft Fair. Today is Day 7. There are 9...yes 9 wonderful giveaways today...so go to Lori's blog and check them out.

Here are two that I particularly love...

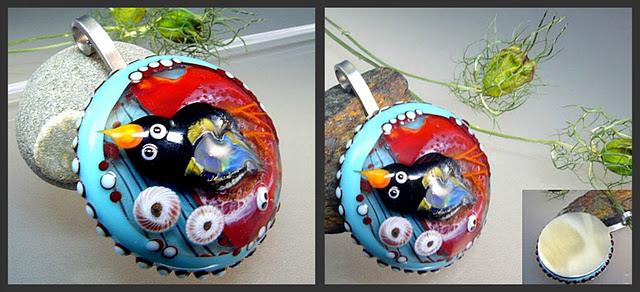
Beautiful Lampwork Pendant by Manuela Wutschke

Manuela was Lori's Bead Soup Blog Party partner and here is the link to the necklace Lori made with the beads Manuela sent her. 

Thumb ring by Catherine Pruitt-  simple and lovely!

So head on over, make a comment, blog, Facebook, Twitter or all...and good luck!

Cheers,

Jenni

Thursday, December 1, 2011

Painting

 For CHALLENGE of COLOR BLOG HOP , please click HERE

Hello dear friends,

I wish I could say I was painting something artistic and fabulous, but no,...this last week I have been painting my youngest daughter's bedroom while she is away in Europe studying and travelling.

I always forget how HARD painting really is! The ceilings are 12 foot high....... so that's the first challenge.
My husband really wasn't interested in doing it...so I somewhat rashly said "I'll do it...you don't need to help!" Hmmm.....!

Three (!!) undercoats were needed to cover the aqua paint in the cornice followed by 2 top coats and the same (one less undercoat) to cover the pale green.
That is a LOT of time up and down a ladder...my legs certainly got a bit of a work out!

While the aqua and pale green combination was very pretty...it was just a bit too "teenage' for a young woman, I think. ( By the way she does know I was probably going to do this!)
So, as much as the look is terribly neutral...it matches the rest of that portion of the house....and besides neutral is good as you can change linen etc!!

Colored cornice

The aqua wall!

A very neutral palette now.

The main walls are still to have their top coat, the woodwork still to be sanded and painted...but I finally feel like the end is in sight. ( dear husband has started to help..think he saw I was starting to struggle a bit!)

I have got lovely new linen bed set and I am going to try and make a padded head board....wish me luck with that one. 
Has anyone had success with headboards...if you have I would love to hear.

Ok...have had my little break...now back to the paint!

Hope you are all having a great day.

Jenni

Wednesday, November 30, 2011

It's a Day of COLOR - 2nd annual Challenge of Color Blog Hop

Hello dear friends,

A week or so ago, I mentioned that I was going to be participating in a Challenge of Color Blog Hop, hosted by the lovely Erin from Treasures Found blog.
Erin has used 12 colour palettes in her own design challenge...take a look...they are stunning!

Just to re-cap what we did - all participants chose a color and were then allocated a colour palette by Erin which came from Jessica at Design Seeds. Jessica has some very unique colour palettes...take a peak; they are gorgeous.

I chose the colour Gray and was allocated "Paw Tones" It is just so soft and pretty...I love it.

"Paw Tones"

As soon as I saw the palette colours, I knew I had the perfect focal bead for it. My friend, Georgie, gave me this wonderful lampwork owl bead and I have been saving it for just the right piece - and this was it. 
The gorgeous greenish base of the focal bead is made with glass from CIM, called 'Kryptonite' which has been etched giving it that soft beachy-type of look.


Owl bead focal.

In the past (not that I have done many!) I have challenged myself by learning something new for each  design challenge. This time, I added a partial coil 'frame' to the bead to give it some weight for hanging purposes and to add additional depth and colour to the area. It also ties in with the use of copper throughout the necklace. Shaping the coil was a little tricky as you can see the bead is irregularly shaped. But I am happy with the result.
This is the first time I have made all my own copper elements from head pins to clasp, coil  and tag.... so I feel I have been true to my own design wishes.

"Owlet"

I added Peruvian Opals, glass daggers, Gray Quartz in light and dark gray, small, matt labradorite beads, tiny metal beads and gray Sari silk. (This is the first time I have used Sari silk ... I am loving it and know I will be using it again.)


This shows the interesting glass daggers that I bought recently...  they reminded me of feathers on the owl. The triangular design on them is silver. I love the variation in colour in the Peruvian Opal. One colour was a little darker than in the palette range, but I left it in as I felt it gave an added colour depth that was needed.

Sari silk and hand-made copper hook and eye clasp. All the copper was darkened with Liver of Sulphur.

I called my necklace "Owlet" as the little owl on the bead really reminded me of an owlet about to leave the nest. (I made a little copper "Fly" tag, too ... yes, a bit corny, I know, but: Oh well!

So that is the story of my palette challenge.

Below is the list of all participants .... have fun blog hopping.

18 Tari Kahrs ~ Orange ~ Citrus Tones
35 CJ Bauschka ~ Teal ~ Teal Air
41 Jenni Connolly ~ Gray ~ Paw Tones
53 Kristen Stevens ~ Pink ~

Goodnight (yep, night-time in Australia)

Jenni

Saturday, November 26, 2011

Virtual Craft Show - A Give Away from Sally Russick

Hello again,

Told you there would be more posts about the The First Annual Craft Show.

And now here is a lovely give away and discount offer from Sally Russick at Wire Worked. It's a good opportunity to start early Christmas shopping. Buying hand crafted is the way to go in my opinion.

So, head on over for a look at Sally's lovely Christmas ornament and discount offers in her  etsy shop.


Good luck to you all,

Jenni

Virtual Craft Show - A Give away from Kristi Bowman

Hello dear friends,

Just wanted to tell you about a great event starting today. The First Annual Craft Show...where 70 artists over a 7 day period are GIVING AWAY 70 hand crafted  and related items. Amazing isn't it.
I am not a participant of this wonderful event ( I thought you had to have an etsy shop to participate....!

Anyway, while not being a participant, I am going to support the event by blogging about all these wonderful  give aways...and probably drive you crazy with the posts!

First one I have read about is Kristi Bowman Design.

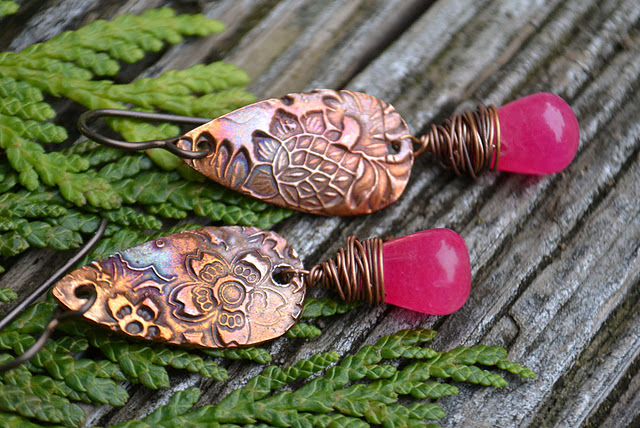
These are her gorgeous copper clay component earrings with Pink Jade briolettes.
Head on over to her blog for a chance of a giveaway...good luck to you.

Cheers,

Friday, November 25, 2011

Challenge of Color - A Sneak Peak


Hello dear friends,

Thought I would tempt you a little with a quick "sneak-peek" of my piece I made for the Challenge of Color Blog Hop hosted by Erin from Treasures Found.


Please come back for the Blog Hop reveal which will be on NOVEMBER 30th.


Cheers for now,

Jenni

Wednesday, November 23, 2011

Bead Table Wednesday - Perseverance is Required!

Hello dear friends,

It's a gorgeous sunny day here in Melbourne. There has been so much Spring rain recently, my garden is running rampant. So, today after this post..that's where I will be...trimming and weeding, cutting and planting. Sounds like fun...yes I love it....although have to pace myself as my back doesn't!

This week I have continued my love affair with copper...bashing and beating it...and doing my best to solder with it. (You Tube has been a great learning tool in this regard...years ago, I did a little bit of soldering..but have really forgotten how to approach it.....so I refreshed my memory on line...you can look anything up there these days!)

Here are a few attempts.

I love my bird house which I textured with hammers etc, however when soldering the second roof line...the copper edging moved. There was actually meant to be a bigger gap where the roof line crossed and I had planned to put a jump ring in there so I could hang it on a cord or chain.....foiled with that idea! So, I drilled a hole...but really, the hole is too far down in to the body of the roof....will have to try it again I guess....patience and perseverance is required!

I am loving this leaf..."smooth and rough" I am calling it...I believe I was  definitely thinking about life  and all it's variances when making this one.

It still needs a bit of Liver of Sulphur Patina...and hopefully, I can drill a hole in the little stalk at the top.
I like the rustic effect of the torch-fired patina in the first leaf I made (Top photo) but it looks more like a pair of lips than a leaf!!

I have also been attempting to learn how to do tube rivets, too...you can see some extremely bad examples in the first photo.....lots of practise and patience required to improve there, I think!
Perseverance required for all.

Part of my front garden and lush Spring growth.

Today I am linking up to  the Flickr site of Bead Table Wednesday..... hosted by Heather  at Humblebeads. You can check out what other people have on their bead table's this week.


Cheers for now,

LinkWithin

Related Posts Plugin for WordPress, Blogger...